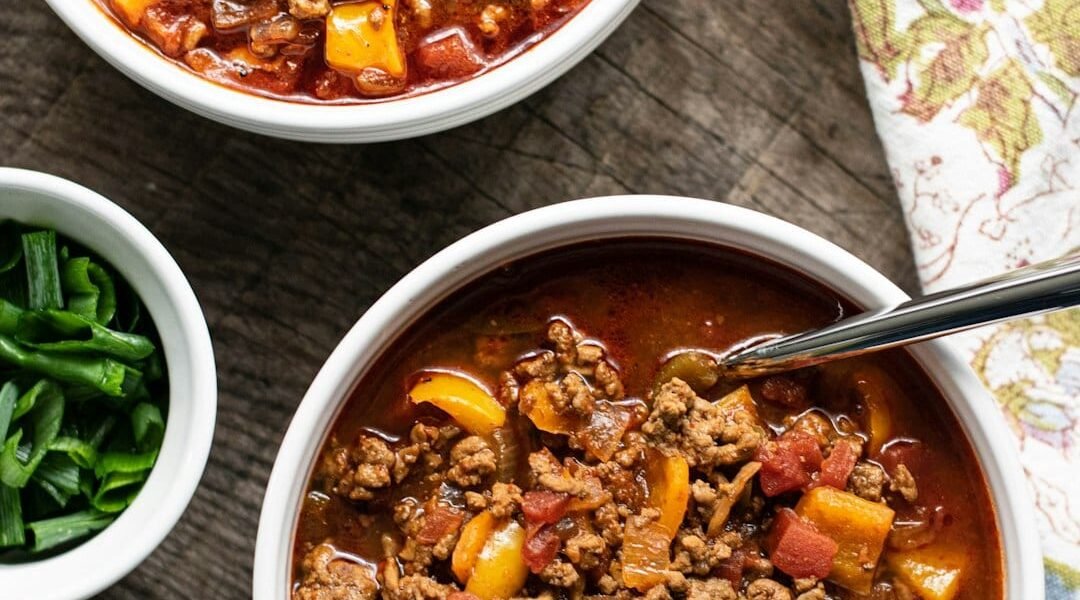
Good chili is the result of a sequence, not a recipe. Get the sequence right and the result is almost automatic.
Chili is one of those dishes with no canonical version — Texans insist on no beans, Midwesterners add kidney beans, New Mexican cooks use dried red chiles, others use chili powder blends. What all good versions share is a layered approach to building flavor: spices bloomed in fat, meat that’s browned hard before liquid is added, aromatics that go in at different stages, and a long enough simmer that everything has time to meld. Shortcut any of those steps and you get something that tastes assembled rather than cooked.
The version here is a classic American chili — ground beef, kidney beans, tomatoes, and a spice blend anchored by cumin and chili powder. It’s built for reliability and depth: the kind of chili that comes together on a Sunday afternoon and tastes significantly better the next day after a night in the fridge. The technique is the same one used in any braise: develop flavor on every surface before adding liquid, then let time do the rest.
What You’re Learning
Blooming spices. Ground spices contain aromatic compounds that are fat-soluble — they release their full flavour when cooked in oil or fat, not when dissolved in liquid. Adding chili powder, cumin, and smoked paprika directly to the hot oil before the meat or tomatoes go in releases these compounds into the fat, which then coats everything that’s added afterward. A spice added to liquid late in the process has a sharper, more raw flavour. A spice that’s been bloomed first has depth, warmth, and complexity that reads as “something you can’t quite identify” — which is the goal. Thirty seconds of blooming is the difference between a chili that tastes like spiced ground beef and one that tastes like something that’s been cooking all day.
Browning meat in batches. When ground beef is added to a pan that’s too full or not hot enough, it steams rather than browns. The moisture it releases has nowhere to evaporate quickly, so the meat cooks through without developing the dark, caramelized surface crust that adds flavour. The fix: work in batches, leave space between the meat so steam can escape, and don’t stir too often. You want the meat to sit on the hot pan surface long enough to brown before it gets moved. The browned surface — not the cooked interior — is what gives the chili its depth. A grey mass of ground beef and a batch of properly browned crumbles will produce completely different flavour in the finished dish.
Ingredients
Makes 6 servings.
- 2 lbs (900g) ground beef, 80/20
- 1 large yellow onion, diced
- 1 green bell pepper, diced
- 4 garlic cloves, minced
- 2 tbsp chili powder
- 1½ tsp ground cumin
- 1 tsp smoked paprika
- ½ tsp dried oregano
- ¼ tsp cayenne pepper, plus more to taste
- One 28 oz (794g) can crushed tomatoes
- One 15 oz (425g) can kidney beans, drained and rinsed
- 1 cup (240ml) beef stock or water
- 1 tbsp tomato paste
- 1½ tsp fine salt, plus more to taste
- 2 tbsp neutral oil
For serving (optional but recommended): shredded cheddar, sour cream, sliced green onions, pickled jalapeños, cornbread.
Method
- Brown the beef. Heat 1 tablespoon of oil in a large, heavy-bottomed pot or Dutch oven over high heat until shimmering. Add half the ground beef in an even layer — don’t stir. Let it sit for 2 to 3 minutes until a dark brown crust forms on the bottom, then break it up and stir. Cook until browned throughout, 3 to 4 minutes more. Transfer to a bowl. Repeat with the remaining oil and beef. Season each batch with a pinch of salt as it cooks.
- Soften the aromatics. Reduce heat to medium. In the same pot (leave any rendered fat and browned bits in the pot — that’s flavour), add the onion and bell pepper. Cook, stirring occasionally, for 6 to 8 minutes until softened and lightly golden. Add the garlic and cook for 1 minute more until fragrant.
- Bloom the spices. Push the vegetables to the sides of the pot. Add the tomato paste to the centre and cook, stirring, for 1 minute until it darkens slightly. Add the chili powder, cumin, smoked paprika, oregano, and cayenne. Stir everything together and cook for 30 to 45 seconds, stirring constantly — the spices will smell intensely fragrant. Don’t let them burn; add a splash of stock if the pot looks dry.
- Add liquid and simmer. Return the browned beef to the pot. Add the crushed tomatoes, drained kidney beans, beef stock, and 1 teaspoon of salt. Stir to combine, scraping up any browned bits from the bottom of the pot. Bring to a boil, then reduce heat to low. Cover partially (leave a small gap for steam to escape) and simmer for 45 minutes to 1 hour, stirring every 15 minutes.
- Adjust and finish. After 45 minutes, taste the chili. Adjust salt, cayenne, and cumin as needed. The chili should be thick enough that a spoon dragged across the surface leaves a slow-filling trail. If it’s too thin, simmer uncovered for another 10 to 15 minutes. If it’s too thick, add a splash of stock or water. Serve in warm bowls with your toppings of choice.
Notes
- It’s better the next day. Chili is one of the few dishes that genuinely improves overnight. The spices continue to meld, the fat redistributes, and the flavours become rounder and more unified. Make it the day before if you’re cooking for guests.
- Brown the meat hard. The most common mistake in chili is adding too much beef at once, which drops the pan temperature and causes steaming instead of browning. Two batches with space between them makes a visible difference in the finished dish.
- Beans are optional. Texas-style chili uses no beans at all — just beef, dried chiles, and time. If you prefer no beans, simply omit them and increase the beef to 2½ lbs. The technique is identical.
- Dried chiles produce deeper flavour. If you have access to dried anchos, guajillos, or pasillas, toasting them in a dry pan, soaking them in hot water, and blending them into the chili produces a more complex base than chili powder alone. That’s the path to great chili — but chili powder is a perfectly legitimate starting point.
- Freeze it. Chili freezes exceptionally well for up to 3 months. Portion it into quart containers before freezing. Thaw overnight in the fridge and reheat over medium-low with a splash of water if it’s too thick.
- The fat is not the enemy. 80/20 ground beef will release a significant amount of fat. Don’t drain it all — some of that fat carries the flavour from the bloomed spices and the browned meat. Drain excess if it pools visibly, but leave a thin coating in the pot.