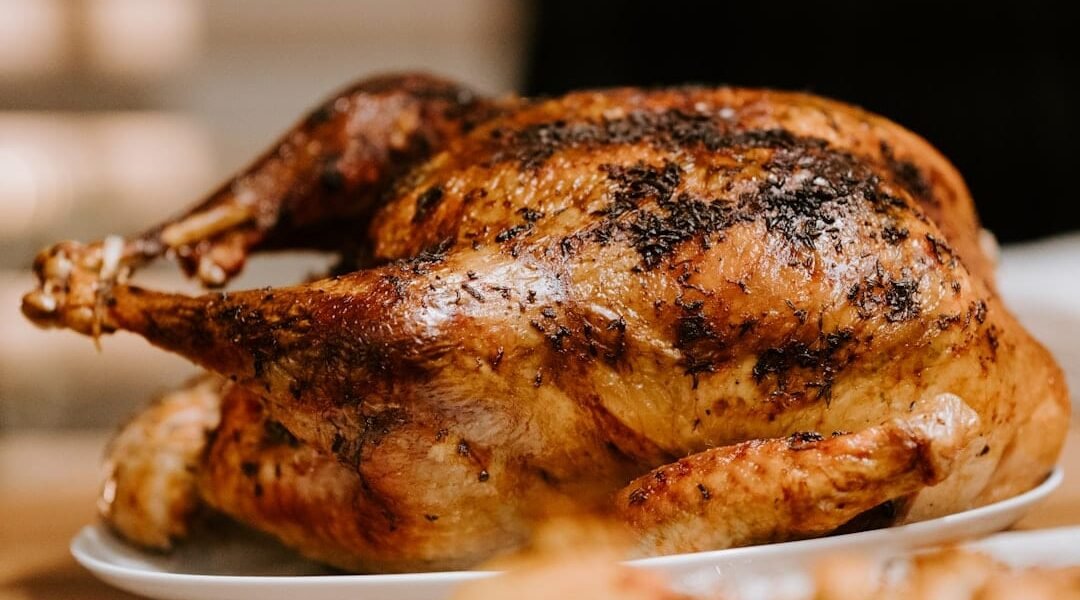
The roast chicken is the most practical recipe a cook can learn — not because it’s dramatic, but because the techniques it teaches appear in almost everything else.
A whole roast chicken is one of those dishes that looks like it requires skill but is mostly a matter of understanding two things: what makes skin crispy, and how to tell when the meat is done. Nail those, and the rest follows. The version here uses a simple dry brine — salt applied to the skin hours before cooking — and a single high temperature throughout. No flipping, no basting, no foil tent. Just a dry bird, a hot oven, and enough time to let it cook through. The result is chicken with lacquered, shatteringly crisp skin and meat that stays juicy to the bone.
Once you’ve roasted a chicken well, you’ll have learned the fundamentals of dry brining, high-heat roasting, and reading doneness by temperature rather than time. Those skills transfer directly to roasting pork, duck, game birds — anything with skin that should be crispy and flesh that shouldn’t be overcooked. This is a recipe worth returning to until it becomes second nature.
What You’re Learning
Dry brining and surface moisture. Crispy chicken skin requires one thing above everything else: a completely dry surface before the bird enters the oven. Salt draws moisture out of the skin through osmosis, but given enough time — at least one hour, ideally overnight in the fridge uncovered — that moisture is reabsorbed along with the dissolved salt, seasoning the meat deeply while the skin dries out. When that dry, salted skin hits a hot oven, it crisps rather than steams. Pat the skin dry just before roasting even if you’ve dry-brined overnight; it’s a useful backup. But the overnight rest makes a visible and audible difference — you’ll hear the skin crackle when you pull it from the oven.
Temperature over time. Recipe cook times are approximations. A 3½-pound chicken and a 4½-pound chicken behave very differently in the same oven, and oven calibration varies widely. The only reliable way to know a chicken is done is to check the internal temperature at the thickest part of the thigh, away from the bone: 165°F (74°C) is the USDA safe temperature, but many cooks pull at 160°F (71°C) and let carryover cooking finish the job during the rest. The breast reaches temperature before the thigh — which is why proper technique positions the bird so the thighs receive more heat. An instant-read thermometer removes all guesswork. Get one.
Ingredients
Makes 4 servings.
- 1 whole chicken (3½–4½ lbs / 1.6–2 kg)
- 1½ tsp fine salt (or 1 tbsp kosher salt)
- ½ tsp freshly ground black pepper
- 1 tbsp olive oil or softened unsalted butter
- 1 lemon, halved
- 4 garlic cloves, smashed and unpeeled
- 4–5 sprigs fresh thyme or rosemary
Method
- Dry brine (ideally the night before). Remove the chicken from its packaging and pat every surface completely dry with paper towels, including inside the cavity. Mix the salt and pepper together, then rub the mixture evenly over all surfaces — under the skin of the breast if you can loosen it gently, over the thighs, legs, and back. Place the chicken uncovered on a wire rack set over a rimmed baking sheet and refrigerate for at least 1 hour, up to 24 hours. The longer it rests, the drier and saltier the skin becomes. If you’re short on time, the minimum is 30 minutes at room temperature — but overnight is the move.
- Bring to room temperature. Remove the chicken from the fridge 30 to 45 minutes before roasting. A cold bird takes longer to cook and tends to cook unevenly — the outside overcooks before the centre comes up to temperature. Pat the skin dry one more time. Rub the outside lightly with olive oil or softened butter.
- Prepare and truss. Preheat the oven to 425°F (220°C). Stuff the cavity loosely with the lemon halves (squeezed), smashed garlic cloves, and herb sprigs. Don’t pack it tightly — airflow inside the cavity helps it cook evenly. Tuck the wing tips behind the breast (fold them back so they don’t burn), then tie the legs together loosely with kitchen twine if you have it. Trussing is optional, but it helps the bird cook more evenly and hold its shape.
- Roast. Place the chicken breast-side up on a wire rack in a roasting pan or oven-safe skillet. Roast at 425°F for 50 to 70 minutes, depending on the size of the bird — roughly 15 minutes per pound is a starting guideline. Do not open the oven during the first 40 minutes. The skin will darken quickly; that’s correct. If it’s browning too aggressively after 50 minutes but the thigh isn’t done yet, tent the breast loosely with foil.
- Check doneness. Insert an instant-read thermometer into the thickest part of the thigh, pushing toward the joint but not touching the bone. You’re looking for 165°F (74°C). If the juices run clear when you pierce the thigh at that spot, that’s a secondary confirmation — but temperature is the only reliable test. Check the breast too: it should read at least 160°F (71°C).
- Rest before carving. Transfer the chicken to a cutting board and let it rest, uncovered, for 10 to 15 minutes before carving. Resting is not optional — it allows the juices that have been pushed toward the centre by the heat to redistribute back through the meat. Cut into a rested chicken and the juices stay on the board. Cut into an unrested one and they pool on the board. Carve by removing the legs first (thigh and drumstick together), then the wings, then slicing the breast away from the carcass in one piece before slicing it across the grain.
Notes
- The overnight salt rest matters. Even one hour makes a difference over no rest at all. If you dry brine in the morning and roast in the evening, the skin will be noticeably drier and the finished bird will be more evenly seasoned throughout.
- Don’t skip resting. Ten minutes minimum. The juices need time to redistribute. This is the single step most home cooks skip and the reason so many roast chickens seem dry — the meat was fine, but carving too soon drained the juice.
- Save the drippings. The fond and fat left in the roasting pan after the chicken comes out is too good to waste. Deglaze the pan with a splash of white wine or chicken stock over medium heat, scraping up the browned bits, and you have an instant pan sauce.
- Use the carcass. Once you’ve eaten the chicken, the bones go into a pot with water, a halved onion, a carrot, a celery stalk, and whatever herb sprigs are left. Simmer for 2 to 3 hours and strain. That’s chicken stock — and it will be better than anything from a carton.
- Spatchcocking cuts the time. Removing the backbone and pressing the bird flat (spatchcock or butterfly cut) reduces roasting time by about 25% and produces even crispier skin all over, since more skin surface sits flat against the pan. Worth learning once you’re comfortable with the standard method.
- Carryover cooking. The internal temperature will rise 3 to 5 degrees after the bird comes out of the oven. If you pull at 160°F, it will finish at 163–165°F during the rest. Pulling at 160°F is not unsafe — the time at temperature kills pathogens even if the final number is slightly below 165°F.