
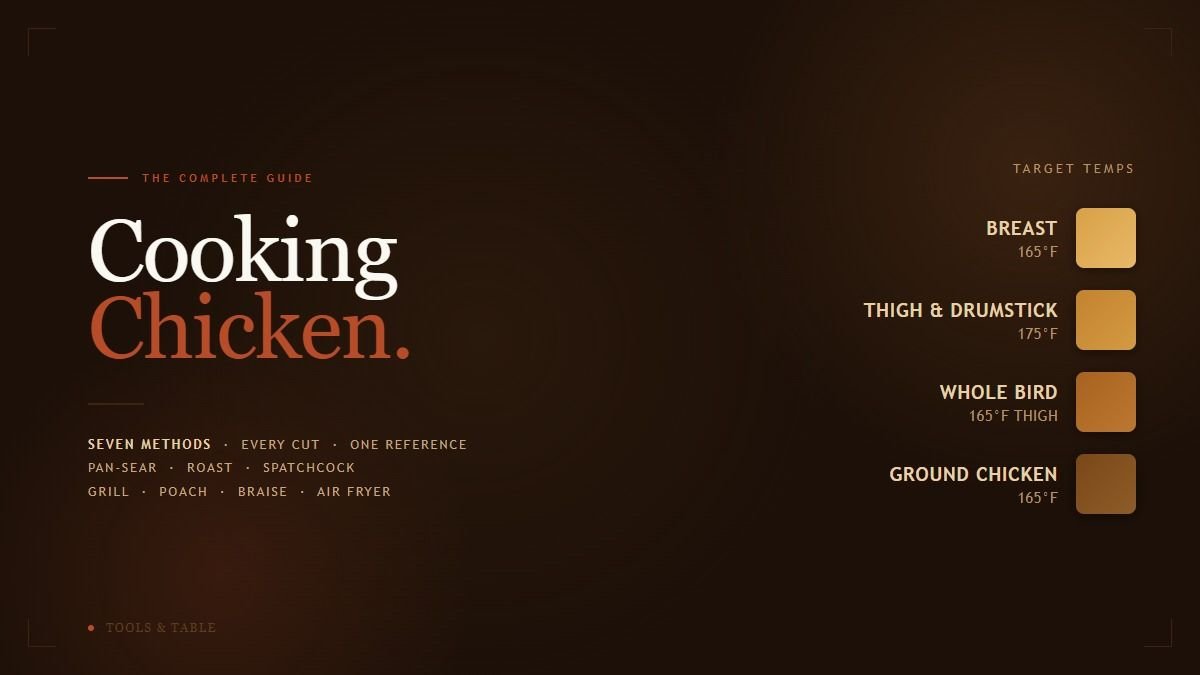
Chicken is the most-cooked protein in most kitchens, and the one people trust the least — because unlike steak, there’s no acceptable range of doneness to hide behind. This guide covers every cut, seven methods, and the one number that actually matters.
The variables are the same ones that govern any protein: cut selection, prep, heat management, and knowing when to stop. The difference is that chicken removes one whole axis of decision-making. Steak has a real spectrum, rare to well done, and it’s genuinely a matter of taste. Chicken doesn’t. Every cut has to clear a safe minimum before it’s food, full stop. The skill isn’t in choosing a doneness, it’s in hitting that number without drying the meat out getting there.
Choosing Your Cut
The cut determines both the cook time and how much margin for error you have. For more on how each cut is broken down, see our Meat Cuts & Cooking Methods guide.
The one variable that matters more than any other is fat and connective tissue. Breast meat is nearly fat-free and cooks fast, which means it has almost no margin between done and dry. Thighs and drumsticks carry real fat and connective tissue, closer to a small, fast braise than a quick sear, and they’re genuinely hard to overcook. That single difference is why the same 165°F target produces a juicy thigh and a chalky breast if you don’t treat them differently.
| Cut | Fat / Skin | Best For | Best Methods |
|---|---|---|---|
| Bone-In, Skin-On Breast | Low (skin adds fat) | Roasting, crispy skin | Roast, grill, pan-sear |
| Boneless, Skinless Breast | Very low | Fast weeknight meals | Pan-sear, poach, grill |
| Thighs (bone-in or boneless) | Medium-high | Hard to overcook | Braise, grill, roast, pan-sear |
| Drumsticks | Medium | Grilling, kid-friendly | Grill, braise, roast |
| Wings | High | Crispy snacks | Air fryer, grill, broiler |
| Whole Bird | Varies by part | Feeding a family | Roast, spatchcock |
| Ground Chicken | Low to medium (blend-dependent) | Tacos, burgers, sauces | Pan-sear, braise |
Universal Prep — Before You Cook Anything
These four rules apply regardless of which method follows.
1. Brine or Dry-Brine
This matters more here than almost anywhere else in the kitchen. Chicken, especially lean breast, has no fat buffer to fall back on if it overcooks slightly — brining is what buys you that margin. A wet brine (a saltwater soak, roughly ¼ cup salt per quart of water, 30 minutes to 2 hours) works fast and suits smaller cuts. A dry brine (salt applied directly, 1 to 24 hours ahead, uncovered in the fridge) works the same way salt does on steak, drawing moisture out, dissolving into it, then getting reabsorbed to season the meat through and dry the surface for better browning — see Salt Is a Conversation, Not an Afterthought for the full mechanism. Either works. Skipping both is the single most common reason chicken turns out dry.
2. Pat Dry
Right before cooking, pat every surface bone-dry, including inside the cavity on a whole bird. Surface moisture turns to steam on contact with heat, which is what stands between you and crispy skin. This step matters even more on chicken than on steak, because skin is the entire payoff of a good sear or roast, and wet skin simply will not crisp.
3. Bring Toward Room Temperature
Thirty minutes on the counter for cutlets and boneless pieces, up to an hour for a whole bird. This matters most for anything bone-in or whole — a cold interior on a large piece creates a steep gradient where the outside is done well before the center catches up, the same problem a cold steak has, just slower to correct because there’s more mass to bring up to temperature.
4. Use a Thermometer, and Know the One Real Rule
Chicken doesn’t have a doneness spectrum. It has a floor: 165°F, everywhere, no exceptions, no personal preference. Below that, harmful bacteria that live on raw poultry aren’t reliably killed. Above it, the meat is safe — what you do past that point is purely a texture decision, and it’s different for different cuts. A good instant-read thermometer is the only reliable way to know where you are relative to that line. Guessing by color or juice clarity is not accurate enough to trust.
Target Temps by Cut
This is the single biggest way chicken differs from steak. There’s no “how do you like it.” There’s a safe minimum everywhere, and a small window past that minimum where texture actually improves for cuts with more connective tissue.
| Cut | Safe Temp | Best-Texture Temp | Why |
|---|---|---|---|
| Breast | 165°F / 74°C | 165°F / 74°C | Lean muscle with no fat buffer — texture only gets worse past the minimum. Pull exactly here. |
| Thigh & Drumstick | 165°F / 74°C | 175–185°F / 79–85°C | Loaded with connective tissue, closer to a small braise than a sear — the extra 10–20°F melts collagen tender, the same logic behind our Oven-Roasted Pork Belly. |
| Whole Bird | 165°F thigh | 165°F breast / 175°F thigh | Two zones finishing at different rates — pull based on the thigh, tent the breast with foil if it finishes first. |
| Ground Chicken | 165°F / 74°C | 165°F / 74°C | Grinding distributes any surface bacteria through the whole batch — there’s no safety margin like an intact muscle cut has. |
Pull temperatures for chicken don’t carry the same 5°F carryover buffer steak gets — chicken pieces are smaller and thinner, so residual cooking after they come off heat is minor. Pull at your actual target, not a few degrees under.
Method 1: Pan-Sear
Best for: Boneless breast or thighs. Weeknight dinners, done in under 15 minutes.
What You Need
A stainless or cast iron skillet, high-smoke-point oil, a thermometer. A meat mallet or the flat side of a chef’s knife is optional but useful for evening out breast thickness.
Steps
- Pound the thick end of breasts to an even ½-inch thickness so they cook evenly top to bottom. Thighs are naturally more even and can skip this.
- Pat dry and season both sides generously.
- Heat oil in the skillet over medium-high until it shimmers.
- Add the chicken and don’t move it for 5 to 6 minutes, until it releases easily and is golden underneath.
- Flip, reduce the heat slightly, and cook another 5 to 7 minutes until it reads 165°F at the thickest part.
- Rest 5 minutes before slicing.
The same grey-band problem that shows up on a thick steak can happen here too, on breasts over an inch thick a hot pan sears the outside long before the middle catches up. For anything thicker than an inch, finish it in a 375°F (190°C) oven after searing both sides.
Method 2: Roast (Whole Bird)
Best for: Feeding a family, meal prep, the most classic chicken preparation there is.
What You Need
A roasting pan or oven-safe skillet, a thermometer, kitchen twine (optional, for trussing).
Steps
- Dry-brine the bird at least 8 hours ahead.
- Pat dry thoroughly, inside the cavity and out, right before roasting.
- Truss the legs loosely for an even shape, or skip it for crispier thigh skin.
- Roast at 425°F (218°C), breast-side up, about 15 to 18 minutes per pound, until the thigh reads 165°F.
- If the breast finishes first, which it usually does, tent it loosely with foil and let the thighs catch up.
- Rest 15 minutes before carving.
Our Roast Chicken recipe walks through this exact method start to finish, including how to build a pan sauce from the drippings.
Method 3: Spatchcock
Best for: A whole bird in nearly half the roasting time, with breast and thighs finishing much closer together.
What You Need
Sharp kitchen shears, a rimmed sheet pan, a thermometer.
Steps
- Flip the bird breast-down and cut along both sides of the backbone with shears; remove it and save it for stock.
- Flip breast-up and press firmly on the breastbone until it cracks and the bird lies flat.
- Dry-brine at least 8 hours if time allows, then pat dry.
- Roast at 450°F (232°C) on the sheet pan, 40 to 50 minutes, until the thigh reads 165°F.
Flattening the bird puts the breast and thighs at roughly the same distance from the heat, closing most of the gap that makes a round whole bird finish unevenly. It’s also genuinely faster, well under an hour instead of the better part of two.
Method 4: Grill
Best for: Bone-in pieces, skewers, real char flavor.
What You Need
A gas or charcoal grill set up for two-zone heat, a thermometer, tongs.
Steps
- Build a two-zone fire: direct high heat on one side, indirect lower heat on the other.
- Sear skin-side down over direct heat until well-marked, about 5 to 6 minutes.
- Move to indirect heat, close the lid, and finish until 165°F for breast, 175°F for thighs and drumsticks.
- Rest 5 minutes.
The most common grilling mistake is cooking entirely over direct heat, which chars the skin black long before the inside is anywhere near done. Two-zone heat is what actually solves it, the same logic behind the reverse sear on steak, just applied outdoors.
Method 5: Poach
Best for: Shredded chicken for tacos, salads, and soups. The most foolproof method for keeping breast meat moist.
What You Need
A pot large enough to submerge the chicken, a thermometer (optional but helpful).
Steps
- Submerge the chicken in cold, well-salted water or stock, with aromatics if you like: a bay leaf, peppercorns, a halved onion.
- Bring just to a bare simmer, then immediately drop the heat to low, barely any bubbles breaking the surface.
- Cook 12 to 15 minutes for average-sized breasts, until 165°F.
- Let the chicken rest in the poaching liquid, off heat, for 5 minutes before removing.
A rolling boil is the one mistake that ruins this method — it seizes the outside of the breast into a rubbery layer before the inside is done. A bare simmer, barely moving, is gentle enough that the whole piece cooks through evenly.
Method 6: Braise
Best for: Bone-in thighs and drumsticks, when you want the meat to fall off the bone.
What You Need
A Dutch oven or heavy pot with a lid.
Steps
- Sear the chicken skin-side down in a hot, oiled pot until deep golden, 6 to 8 minutes; flip and sear another 2 to 3 minutes. Remove.
- Build the braising liquid in the same pot: aromatics first, then broth or wine, enough to come about a third of the way up the chicken once it’s back in.
- Return the chicken to the pot skin-side up, so the skin stays out of the liquid.
- Cover and cook low, either a bare simmer on the stovetop or a 325°F (163°C) oven, 35 to 45 minutes, until the meat reads 175–185°F and pulls easily from the bone.
This is the same dry-brine-and-slow-heat logic behind our Oven-Roasted Pork Belly, applied in liquid form. Chicken thighs have real connective tissue too, just less of it than pork belly, so a much shorter braise gets you the same fall-apart result.
Method 7: Air Fryer / Broiler
Best for: Wings, tenders, small cuts — crispy skin fast, without heating the whole oven.
What You Need
An air fryer, or your oven’s broiler. A thermometer.
Steps
- Pat the chicken bone-dry, toss with a little oil, and season.
- Air fryer: 380°F (193°C), 18 to 22 minutes for bone-in pieces, flipping halfway. Broiler: top rack, 6 to 8 minutes per side, watching closely.
- Check the thickest piece with a thermometer: 165°F for breast pieces, 175°F for thighs, drumsticks, and wings.
Both methods work the same way, intense, close heat that crisps the skin fast. The broiler runs hotter and is less forgiving, a minute of distraction can take it from golden to burnt. The air fryer’s enclosed, circulating heat is more forgiving and the better choice if you’re multitasking.
Resting
Resting matters less here than it does for a thick steak — there’s far less carryover cooking to account for on a piece this size — but five minutes still makes a real difference for anything bone-in or whole. Tent loosely with foil rather than wrapping tightly. A tight wrap traps steam and softens any skin you worked to crisp up.
Finishing: Herb Butter and Pan Sauce
For a whole bird or bone-in breasts, loosen the skin from the meat before it cooks and spread compound butter directly onto the flesh underneath. It bastes the breast from the inside as it renders, and the skin still crisps normally on the outside.
Basic Garlic-Herb Compound Butter
8 tablespoons (115g) softened unsalted butter + 2 finely minced garlic cloves + 1 tablespoon finely chopped fresh thyme or rosemary + ½ teaspoon salt + several grinds of black pepper. Mix until combined, then spread evenly under the skin before roasting or grilling.
Pan Sauce
After pan-searing, or after a roast bird comes out of the pan, pour off most of the fat, leaving about a tablespoon. Deglaze with ¼ cup of white wine or chicken stock, scraping up the fond, the browned bits, with a wooden spoon. Add a tablespoon of butter and reduce over medium heat for 2 minutes until slightly thickened. The same fond-based technique builds the sauce in our Pork Tenderloin with Pan Sauce recipe.
Common Mistakes
- Not brining lean cuts. Boneless, skinless breast has zero fat buffer. Skip the brine and you’re gambling on dryness.
- Pulling breast past 165°F “to be safe.” That’s not extra safety, 165°F is already fully safe. Past that, it’s just dry chicken.
- Checking only one spot on a whole bird. Breast and thigh finish at different rates. Checking just one gives you either undercooked thighs or overcooked breast.
- Cooking straight from the fridge. A cold whole bird cooks unevenly, the same steep gradient problem as a cold steak, just slower to fix because there’s more mass.
- Crowding the pan or grill. Chicken releases moisture as it cooks. Too much in one pan steams it instead of searing it.
- Cutting into it to check doneness. Same rule as steak: every cut releases juice. Buy a thermometer.
- Wrapping tightly in foil to rest. Traps steam and ruins any crispy skin you just worked for.