
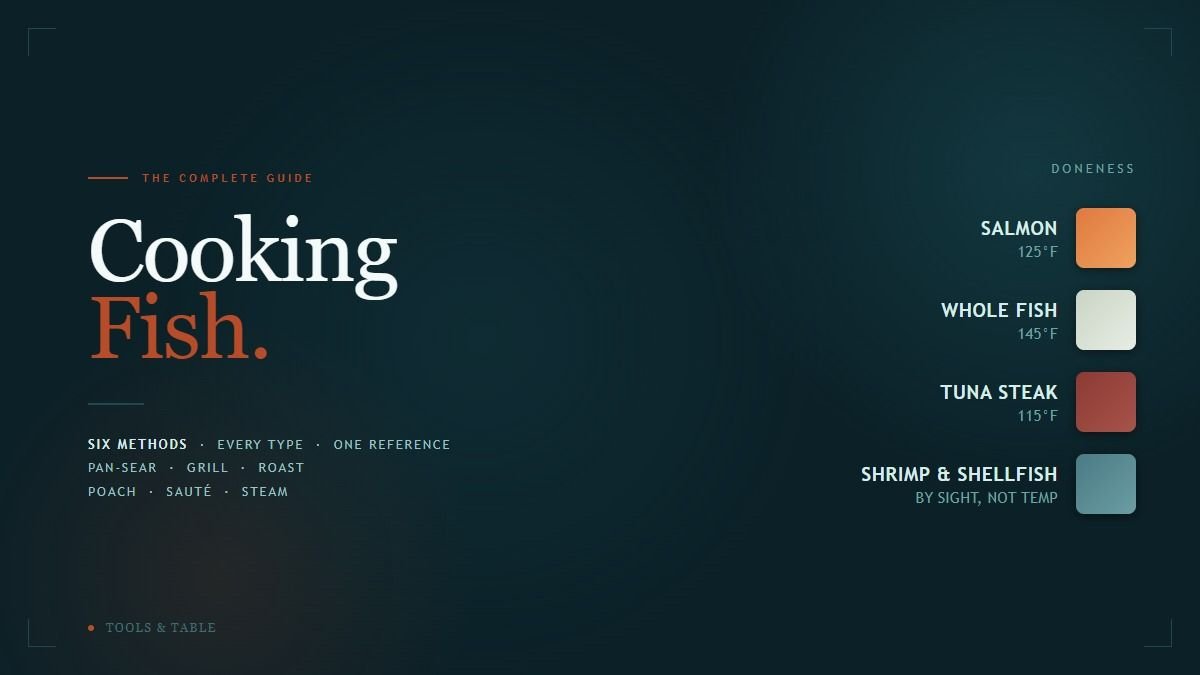
Fish breaks the rules steak and chicken taught you. There’s no doneness spectrum to choose from, and there’s no single safety floor to hit and stop thinking about. Instead there’s a narrow window, sometimes less than a minute wide, and the FDA-safe temperature isn’t always the temperature that tastes best. This guide covers six methods across the seafood counter and what actually changes between them.
The variables are still cut selection, prep, heat management, and knowing when to stop, the same four that govern any protein. What’s different is the margin. A steak forgives a minute of distraction. Chicken thighs practically forgive carelessness. Fish punishes overcooking harder than anything else in the kitchen, going from perfect to chalky in the time it takes to answer the phone. The skill here isn’t choosing a doneness or clearing a safety floor, it’s paying attention.
Choosing Your Seafood
Unlike a single animal broken into cuts, “fish” on this guide covers six genuinely different proteins with different structures and different failure points. For more on how each is typically sold and handled, see our Meat Cuts & Cooking Methods guide.
The variable that matters most here isn’t fat, it’s structure. Fatty fish like salmon has enough richness to forgive a slightly-too-hot pan. Lean white fish has almost no fat to fall back on and flakes apart the moment it’s pushed too far. Tuna is dense muscle meant to be treated like a rare steak, not cooked through. And shellfish doesn’t behave like fish at all, it’s done by sight, not touch or temperature.
| Type | Structure | Best For | Best Methods |
|---|---|---|---|
| Salmon Fillet | Fatty, forgiving | Weeknight dinners, crisp skin | Pan-sear, grill, roast |
| Whole Fish | Bone-in, holds moisture | Branzino, snapper, trout | Grill, roast |
| White Fish Fillet | Lean, delicate, flakes fast | Cod, halibut, tilapia | Pan-sear, roast, poach |
| Tuna Steak | Dense, meant to stay rare | A hot pan, 90 seconds a side | Sear, grill |
| Shrimp | Small, cooks in minutes | Fast weeknight protein | Sauté, grill, boil |
| Clams & Mussels | Shellfish, done by sight | One-pot dinners | Steam |
Universal Prep — Before You Cook Anything
These four rules apply regardless of which method follows.
1. Buy It Fresh, or Thaw It Right
This is the one lever that matters more for fish than for any other protein, and there’s no technique that fixes a fillet that wasn’t fresh to begin with. At the counter, fresh fish smells like the ocean or nothing at all, never “fishy” or sour, and the flesh should spring back when pressed. Frozen fish should thaw slowly in the fridge overnight, never on the counter or under hot water, both of which cook the surface before the center even thaws.
2. Keep It Cold Until It Hits the Heat
This is the opposite of the steak and chicken rule, and it’s deliberate. Fish is thin enough that it cooks through fast regardless of starting temperature, so there’s no gray-band problem to solve by tempering, and it’s a far more perishable protein than beef or poultry. Keep it refrigerated until you’re ready to cook, and don’t let it sit out.
3. Pat Dry
Same rule as chicken, for the same reason. Surface moisture steams instead of searing, and skin that’s still damp will not crisp no matter how hot the pan is. Pat every piece bone-dry right before it goes anywhere near heat.
4. Know Your Doneness Signals, Not Just a Number
The FDA’s blanket safe temperature for fish is 145°F, but that’s well past ideal texture for a lot of preparations, and most of the seafood counter isn’t judged by thermometer at all. Salmon is commonly pulled at 125°F for a silky medium. Shrimp is judged by shape, not temperature. Clams and mussels tell you themselves when they’re ready. Treat 145°F as the safety ceiling for anything you’re not confident buying rare, not as the target for every single thing on this list.
Doneness by Type
This is the single biggest way fish differs from steak and chicken. There’s no universal number, and for half of this list, a thermometer isn’t even the right tool.
| Type | Pull Point | How to Tell |
|---|---|---|
| Salmon Fillet | 125°F / 52°C (medium) | Skin-side down first for a crisp crust; pull early, it keeps cooking off the heat. |
| Whole Fish | 145°F / 63°C | Bone-in holds moisture better than a fillet — score the skin so heat reaches the center evenly. |
| White Fish Fillet | 145°F / 63°C | Delicate and flakes apart fast — a gentler hand than salmon, and check a minute early. |
| Tuna Steak | 115°F / 46°C (rare-medium center) | A hot pan, 60–90 seconds a side, is the difference between silky and chalky. |
| Shrimp | No thermometer — go by shape | Opaque and curled into a loose C means ready; a tight O means overcooked and rubbery. |
| Clams & Mussels | No thermometer — go by the shell | Ready the moment shells pop open, usually 5–8 minutes. Any shell that stays shut after that gets discarded, not forced. |
Carryover cooking on fish is real but brief, a minute at most, since most cuts are thin. Pull salmon and tuna a few degrees under your target; everything else is thin enough that carryover barely registers.
Method 1: Pan-Sear
Best for: Salmon and other fillets with skin on. Crisp skin, weeknight speed.
What You Need
A stainless or cast iron skillet, high-smoke-point oil, a fish spatula for flipping without tearing the skin.
Steps
- Pat the fillet bone-dry, season both sides, and score the skin lightly if it’s thick.
- Heat oil in the skillet over medium-high until it shimmers.
- Lay the fillet skin-side down and press gently for the first 10 seconds so it doesn’t curl. Don’t move it for 4 to 5 minutes, until the skin releases easily and is deeply golden.
- Flip and cook the flesh side just 1 to 2 minutes more, until it reads 125°F for salmon or 145°F for white fish at the thickest point.
- Serve immediately, skin-side up to keep it crisp.
Our Pan-Seared Salmon recipe walks through this exact method, including how to tell when the skin has actually released instead of forcing it too early.
Method 2: Grill
Best for: Whole fish and tuna steaks. Real char flavor, outdoor cooking.
What You Need
A hot, well-oiled grill grate, a thin metal spatula, a thermometer for whole fish (skip it for tuna, timing is more reliable there).
Steps
- Oil the grate itself, not just the fish, right before cooking, this is what actually prevents sticking.
- Whole fish: score the skin, grill 6 to 8 minutes per side over medium-high, until it reads 145°F at the thickest point near the spine. Tuna steak: sear over high heat just 60 to 90 seconds per side for a rare-medium center.
- Let whole fish rest 2 to 3 minutes; tuna needs none, it’s served rare on purpose.
Our Grilled Whole Branzino recipe covers the whole-fish version in detail, including how scoring the skin helps it cook through evenly without drying the surface out.
Method 3: Roast
Best for: Whole fish or fillets, hands-off, cooking for more than two people at once.
What You Need
A rimmed sheet pan, parchment or foil, a thermometer.
Steps
- Pat dry, season, and arrange on a parchment-lined sheet pan with a little room between pieces.
- Roast at 400°F (204°C): 10 to 12 minutes for fillets, 20 to 25 minutes for a whole fish, depending on thickness.
- Pull salmon at 125°F, white fish and whole fish at 145°F.
This is the most forgiving method on this list, dry, even heat with no direct flame to outrun. It’s the right choice when you’re cooking several pieces at once and can’t stand over a pan watching each one individually.
Method 4: Poach
Best for: White fish fillets. The gentlest method here, and the hardest one to overcook by accident.
What You Need
A wide, shallow pan, enough liquid to submerge the fish (water, stock, or wine with aromatics).
Steps
- Bring the poaching liquid to a bare simmer, barely any bubbles breaking the surface, with a bay leaf, lemon slices, and peppercorns if you like.
- Slide in the fillets and adjust the heat so the liquid never returns to a real simmer.
- Cook 8 to 10 minutes for average-sized fillets, until they flake easily and read 145°F.
- Lift out gently with a slotted spatula, the fish is delicate enough now to fall apart if handled roughly.
Same rule as poaching chicken: a rolling boil ruins this method, agitating the fish apart before it’s even done. Gentle heat is the entire technique.
Method 5: Sauté
Best for: Shrimp. Done in minutes, genuinely hard to get right without watching closely.
What You Need
A wide skillet, high heat, a couple minutes of undivided attention.
Steps
- Pat the shrimp dry and season. A dry shrimp sears; a wet one steams.
- Heat oil over medium-high until shimmering, then add the shrimp in a single layer without crowding.
- Cook 1 to 2 minutes per side, until opaque and curled into a loose C shape.
- Pull them the moment they curl. A tight, tense O shape means they’ve already gone too far.
Shrimp go from perfect to rubbery in under a minute, faster than almost anything else in this guide. Shape, not color or time, is the only signal worth trusting.
Method 6: Steam
Best for: Clams and mussels. The shellfish tell you themselves when they’re ready.
What You Need
A large pot with a tight-fitting lid, about ½ inch of liquid (wine, broth, or water with aromatics).
Steps
- Discard any clams or mussels that are already open and don’t close when tapped, they’re dead and unsafe before you even start.
- Bring the liquid to a boil, add the shellfish, cover, and steam.
- Check at 5 minutes, then every minute after: they’re done the moment the shells pop open, usually by 5 to 8 minutes total.
- Discard any shell that hasn’t opened after 8 to 10 minutes. Don’t pry it open, that’s the shellfish telling you it wasn’t good to begin with.
This is the one method on this list with a built-in doneness signal you can’t misread. Trust the shells, not the clock.
Resting
Fish barely needs it. Most cuts are thin enough that there’s almost no carryover cooking to let settle. Give salmon and tuna steaks two to three minutes before cutting in, mostly so the exterior isn’t scalding, and skip resting entirely for fillets, shrimp, and shellfish, they’re better eaten the moment they’re ready.
Finishing: Brown Butter and Pan Sauce
Fish’s natural richness pairs with fat more than it needs a heavy sauce. A simple brown butter finish, or a quick pan sauce built in the same skillet, is usually all it needs.
Brown Butter and Lemon
After searing, wipe the pan, add 3 tablespoons (43g) of butter, and cook over medium heat until it foams, then turns golden-brown and smells nutty, about 2 to 3 minutes. Off heat, squeeze in the juice of half a lemon and swirl. Spoon it straight over the fish.
Quick Pan Sauce
After pan-searing, pour off excess oil and deglaze with ¼ cup white wine or stock, scraping up the fond with a wooden spoon. Reduce by half, about 2 minutes, then swirl in a tablespoon of cold butter off heat until glossy. The same fond-based technique builds the sauce in our Pork Tenderloin with Pan Sauce recipe.
Common Mistakes
- Walking away, even briefly. Fish punishes overcooking harder than any other protein. What’s fine to step away from on a steak isn’t fine here.
- Buying fish that isn’t actually fresh. No technique rescues a fillet that was already past its window at the counter. Smell and texture matter more than the sell-by date.
- Letting it come to room temperature first. Unlike steak and chicken, fish should go from the fridge straight to the heat.
- Flipping before it releases. Fish sticks to a pan it isn’t ready to leave yet. Forcing it early tears the skin and leaves it behind.
- Crowding the pan. Same problem as chicken, too much at once drops the pan’s temperature and steams instead of sears.
- Forcing open a shell that didn’t open on its own. A clam or mussel that stays shut after steaming wasn’t good before it went in the pot.
- Judging shrimp by color instead of shape. Both a perfectly-cooked and an overcooked shrimp turn opaque pink. Shape (loose C vs. tight O) is the only reliable tell.