Pork is really two different animals to cook. One side is lean and fast, tenderloin and chops, cuts that dry out if you push them a few degrees too far. The other side is fatty and slow, shoulder, belly, ribs, cuts that stay tough right up until they’ve been cooked well past what looks like “done.” Both halves come off the same pig, and treating them the same way is the single most common reason pork has a worse reputation than it deserves.
This guide splits pork the way it actually behaves: which cuts belong to which side, the two real target temperatures that matter, and six methods that cover everything from a fifteen-minute weeknight chop to a shoulder that needs the better part of a day.
Choosing Your Cut
For how each cut is broken down on the animal, see our Meat Cuts & Cooking Methods guide. What matters here is simpler: how much fat and connective tissue a cut carries, because that single variable decides which half of this guide it belongs to.
Tenderloin, loin, and chops come from muscles that do almost no work, so they’re naturally tender with very little fat to protect them. Push them past their target temperature and there’s nothing left to save the texture. Shoulder, belly, and ribs come from muscles that work constantly, loaded with collagen that’s tough at low temperatures and only turns tender after hours of sustained heat. Ground pork can come from either half, depending on the blend, which is why it gets its own rule rather than borrowing one from either side.
| Cut | Fat / Collagen | Best For | Best Methods |
|---|---|---|---|
| Tenderloin | Very low | Fast weeknight dinners, pan sauce | Sear & oven-finish, grill |
| Loin & Chops | Low | Quick cooks, easy to overcook | Sear & oven-finish, grill |
| Shoulder / Butt | High | Pulled pork, carnitas | Smoke, braise, low & slow roast |
| Belly | Very high | Rendered, sliceable roasts | Low & slow roast, smoke |
| Ribs (baby back / St. Louis) | High | Barbecue, fall-off-the-bone texture | Smoke, braise |
| Ham / Leg | Low to medium | Roasting whole, large gatherings | Low & slow roast |
| Ground Pork | Varies by blend | Tacos, sausage, meatballs | Pan-cook |
Universal Prep — Before You Cook Anything
These four rules apply regardless of which half of the animal you’re working with.
1. Salt Early
A dry-brine, salt applied directly to the surface hours ahead of time, matters on both halves of the animal, for different reasons. On lean cuts it seasons the meat all the way through instead of just the surface. On fatty, collagen-heavy cuts like belly and shoulder it does the same thing while also drying the exterior for a better crust. Our own Oven-Roasted Pork Belly dry-brines 8 to 24 hours before it ever sees the oven. See the Brining & Marinating guide for the full mechanism behind why this works.
2. Pat Dry
Right before it hits heat, pat every surface bone-dry. Surface moisture turns to steam on contact with a hot pan or oven, which is what stands between you and a real crust, whether that’s a seared tenderloin or a caramelized belly.
3. Bring Toward Room Temperature
Thirty minutes on the counter for chops and tenderloin. A cold interior on a lean cut widens the gap between a seared exterior and a still-cold center, the same problem a cold steak has, just with less fat to buy you forgiveness. Large collagen-heavy cuts like a whole shoulder are usually cooked straight from the fridge since their cook times run hours regardless.
4. Use a Thermometer, and Know Which Rule Applies
Pork doesn’t have one target temperature, it has two, and using the wrong one is where most bad pork comes from. Lean, tender cuts are pulled at a safe minimum and no higher. Fatty, collagen-heavy cuts are pulled well past that same minimum, because the extra heat is doing structural work, not just clearing a safety bar. Which rule applies depends entirely on the cut, covered in full below.
Target Temps by Cut
For decades the advice was to cook all pork to 160–170°F, a holdover from when trichinosis was a real concern and there was no reliable way to test for it in the meat supply. The USDA revised that guidance in 2011: whole-muscle pork is safe at 145°F with a 3-minute rest. Ground pork is a separate case, held at the older, higher standard, because grinding distributes any surface bacteria through the entire batch instead of leaving it on the outside where heat reaches it first, the same reasoning behind ground chicken’s 165°F floor in our Chicken guide.
| Cut | Pull Temp | Why |
|---|---|---|
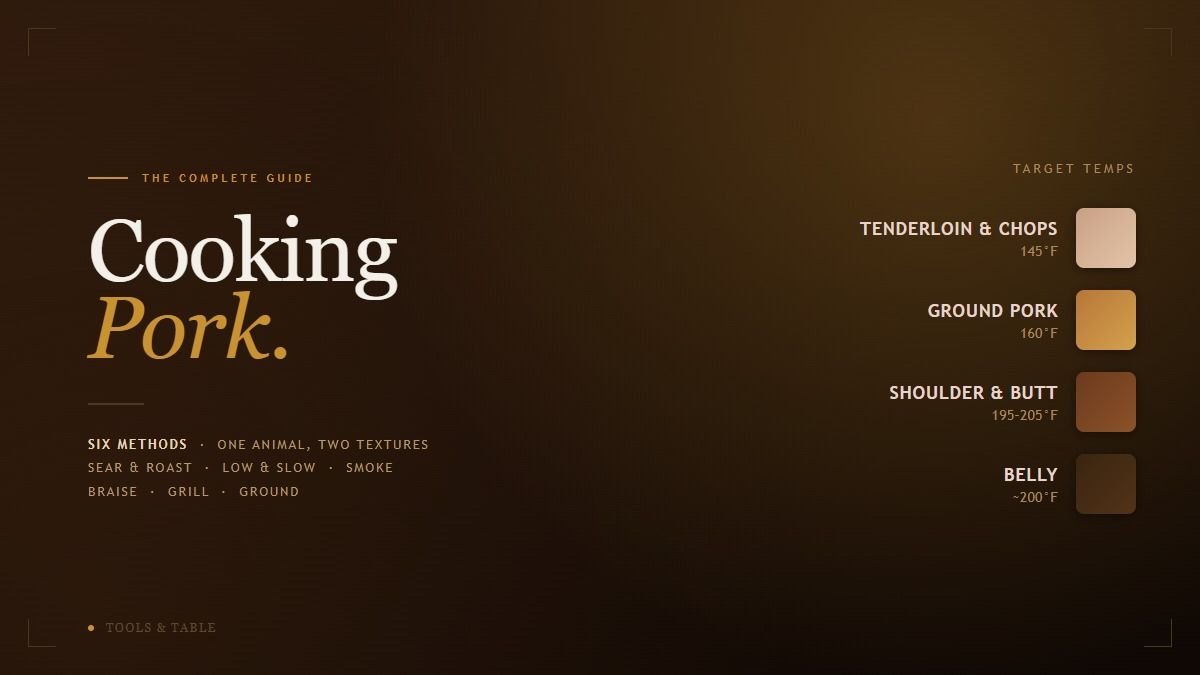
| Tenderloin, Loin & Chops | 145°F / 63°C + 3-min rest | Lean, whole-muscle cuts. Safe the moment they clear this line, and only get worse past it. |
| Ground Pork | 160°F / 71°C | Grinding spreads surface bacteria through the batch, the same logic as ground beef and ground chicken. |
| Shoulder, Butt & Ribs | 195–205°F / 90–96°C, probe-tender | Loaded with collagen. The number is a starting point, the meat needs to feel probe-tender before it actually comes off. |
| Belly | ~200°F / 93°C | Same collagen logic as shoulder, just in a flatter cut. See Oven-Roasted Pork Belly for the full breakdown of why. |
Lean cuts carry real carryover, a tenderloin pulled at 145°F commonly climbs to around 150°F while resting, so pull at the number, not past it. Collagen-heavy cuts don’t work the same way. At 195°F and above you’re not waiting for residual heat to finish a job, you’re confirming the collagen has actually broken down, which a thermometer alone can’t fully tell you. That’s what the probe-tender test is for, covered under Method 2 below.
Method 1: Sear & Oven-Finish
Best for: Tenderloin and thick-cut chops. A hard sear for crust, a gentle oven to finish without drying the outside.
What You Need
An oven-safe skillet, cast iron or stainless, not non-stick, which can’t take the heat a real sear needs and won’t build the fond a pan sauce depends on. A thermometer is not optional here.
Steps
- Preheat the oven to 400°F (200°C). Pat the meat bone-dry and season.
- Heat oil in the skillet over high heat until it’s just short of smoking.
- Sear without moving it, 2 to 3 minutes per side, rotating to brown all surfaces, roughly 8 minutes total for a whole tenderloin.
- Transfer the skillet to the oven. Roast 10 to 15 minutes, checking at the 10-minute mark, until the thickest part reads 145°F.
- Rest 8 to 10 minutes, tented loosely with foil, before slicing.
Our Pork Tenderloin with Pan Sauce recipe walks through this exact method start to finish, including how to turn the fond left in the pan into a five-minute sauce.
Method 2: Low & Slow Roast
Best for: Belly, smaller shoulder roasts, ham. A moderate oven and hours of time do the work a hot oven can’t.
What You Need
A wire rack set over a foil-lined sheet pan or roasting pan, and a thermometer.
Steps
- Dry-brine 8 to 24 hours ahead, then pat dry right before roasting.
- Set the pork fat-side up on the wire rack so rendering fat drips away instead of pooling underneath.
- Roast at 325°F (163°C). Cook to temperature, not a fixed time, since thickness and fat content vary, start checking with a thermometer well before you expect it to be done.
- Pull once the thickest part reads 195–205°F for shoulder-type cuts or around 200°F for belly, and it feels probe-tender, almost no resistance when a thermometer or skewer slides in.
- Rest 10 to 15 minutes before slicing.
The wire rack matters as much as the temperature. It lifts the meat out of its own rendered fat so the bottom caramelizes instead of steaming in it, exactly what our Oven-Roasted Pork Belly recipe relies on for a crust with no broiler step at all.
Method 3: Smoke
Best for: Shoulder, ribs. Where pork and barbecue actually meet.
Pork shoulder runs 225°F for roughly 1.5 to 2 hours per pound, pulled at 195–205°F. Baby back ribs run 225–250°F for 5 to 6 hours; St. Louis ribs, 6 to 7. Both rib cuts are judged by the bend test, not a number, the rack should droop and the surface crack slightly when lifted from one end with tongs. All three will hit a stall, a long plateau where internal temperature stalls for an hour or more as surface moisture evaporates, and the mechanics of pushing through it, wrapping, timing, wood selection, are covered in full in our Smoking Guide. That guide and this one share the same underlying rule: pork shoulder is a collagen cut, and the extra heat past 145°F is converting tissue, not overcooking it.
Method 4: Braise
Best for: Shoulder or ribs, indoors, no smoker required. The fastest route to pulled pork without live fire.
What You Need
A Dutch oven or heavy pot with a lid.
Steps
- Sear the pork on all sides in a hot, oiled pot until deeply browned, about 3 to 4 minutes per side. Remove.
- Build the braising liquid in the same pot: aromatics first, then broth, cider, or a mix, enough to come about a third of the way up the meat once it’s back in.
- Return the pork to the pot, cover, and cook low, either a bare simmer on the stovetop or a 300–325°F (150–163°C) oven, 3 to 4 hours for a shoulder roast, until it reads 195–205°F and shreds easily with two forks.
- Rest 15 minutes before shredding, then spoon some of the braising liquid back over the meat.
This is the same dry-heat-versus-liquid tradeoff behind a lot of collagen cooking: a smoker builds bark that a covered pot can’t, but a braise gets you the same fall-apart texture indoors, in a single pot, with no fire management at all.
Method 5: Grill
Best for: Chops and tenderloin. Real char flavor on cuts that still need a gentle hand.
What You Need
A gas or charcoal grill set up for two-zone heat, a thermometer, tongs.
Steps
- Build a two-zone fire: direct high heat on one side, indirect lower heat on the other.
- Sear over direct heat until well-marked, 3 to 4 minutes per side for chops, slightly less for a butterflied tenderloin.
- Move to indirect heat and finish, lid closed, until the thickest part reads 145°F.
- Rest 5 minutes before serving.
Lean cuts have no fat buffer to survive a mistake, so the same two-zone logic that saves chicken from a charred-outside-raw-inside result matters even more here. All direct heat chars the surface long before the center clears 145°F.
Method 6: Ground Pork
Best for: Tacos, meatballs, sausage-style fillings. The one pork method with no rest and no carryover to plan around.
Steps
- Heat a skillet over medium-high with a small amount of oil.
- Add the pork, breaking it up with a spoon for loose fillings, or leave it formed for patties and meatballs.
- Cook, stirring occasionally for loose pork or flipping once for formed pieces, until no pink remains and it reads 160°F.
- Drain excess fat if the blend is a fatty one, then season and use immediately.
Ground pork is small and thin enough that there’s essentially no carryover cooking to account for, unlike a whole tenderloin. Pull it at 160°F, not a few degrees under expecting it to climb.
Resting
Resting means something different depending on which half of the animal you’re working with. Lean cuts get a short rest, 5 to 10 minutes, tented loosely with foil, mostly to let carryover heat finish the job and juices settle back in before slicing. Collagen-heavy cuts get a longer rest, at least 10 to 15 minutes for something belly-sized, closer to 30 minutes to an hour for a full shoulder, because that time is doing real work letting rendered fat and gelatin redistribute through the meat rather than run out the moment it’s cut.
Finishing: Pan Sauce and Bark
The two halves of the animal get finished two different ways, and neither one is optional if you want the dish to actually taste like more than the meat alone.
Pan Sauce, for Lean Cuts
After searing a tenderloin or chops, the browned bits left in the pan, the fond, are concentrated flavor, not something to scrub off. Deglaze with a splash of wine or stock, scraping the fond loose with a wooden spoon, reduce for a couple of minutes, then whisk in cold butter off the heat to finish. The full version, aromatics, mustard, and the emulsion technique, is in our Pork Tenderloin with Pan Sauce recipe.
Bark and Sauce, for Collagen Cuts
On a smoked or slow-roasted shoulder, the dark, caramelized crust that forms over hours, the bark, is the payoff for the long cook and shouldn’t be buried under sauce until the very end. If barbecue sauce is part of the plan, it goes on in the last few minutes of heat or after the meat comes off entirely, not earlier, sugar-heavy sauce burns well before a multi-hour cook is actually done. See our Kitchen Mistakes guide for exactly why that timing mistake is so common.
Common Mistakes
- Cooking every cut to 160°F “to be safe.” That’s the old, outdated guideline. Whole-muscle pork has been safe at 145°F since the USDA’s 2011 revision, and every degree past it on a lean cut is pure moisture loss.
- Pulling shoulder or belly at 145°F because that’s “the pork temperature.” That number is for lean, whole-muscle cuts. Collagen-heavy cuts are tough and chewy at 145°F, they need 195°F or higher and a probe-tender check before they’re actually done.
- Skipping the dry-brine on belly or shoulder. Even the low end of an 8-hour window makes a real difference to both seasoning depth and how well the crust caramelizes.
- Leaving the silver skin on a tenderloin. That thin, bluish connective tissue never breaks down with heat and makes the whole piece bow as it cooks. Trim it before it hits the pan.
- Using a non-stick pan for the sear. Non-stick can’t take the heat a real sear needs, and it won’t build the fond a pan sauce depends on.
- Saucing ribs or shoulder too early. Sugar-heavy barbecue sauce burns long before a multi-hour smoke or roast is finished. Sauce at the very end, or after it comes off the heat.
- Slicing or pulling without resting. Skip the rest and the juices, or on a collagen cut, the redistributed fat and gelatin, end up on the cutting board instead of in the meat.